Begin Your Crypto Security Journey at Trézor.io/Start®
So, you’ve just bought a Trezor hardware wallet — smart move! You’re taking a serious step toward protecting your digital wealth. But before you can start sending, receiving, or storing crypto, there's one essential first step: setting up your wallet the right way.
That’s where Trézor.io/Start® comes in. Whether you're completely new to crypto or switching from a software wallet, this official setup guide has everything you need to know to get started safely and confidently.
What is Trézor.io/Start®?
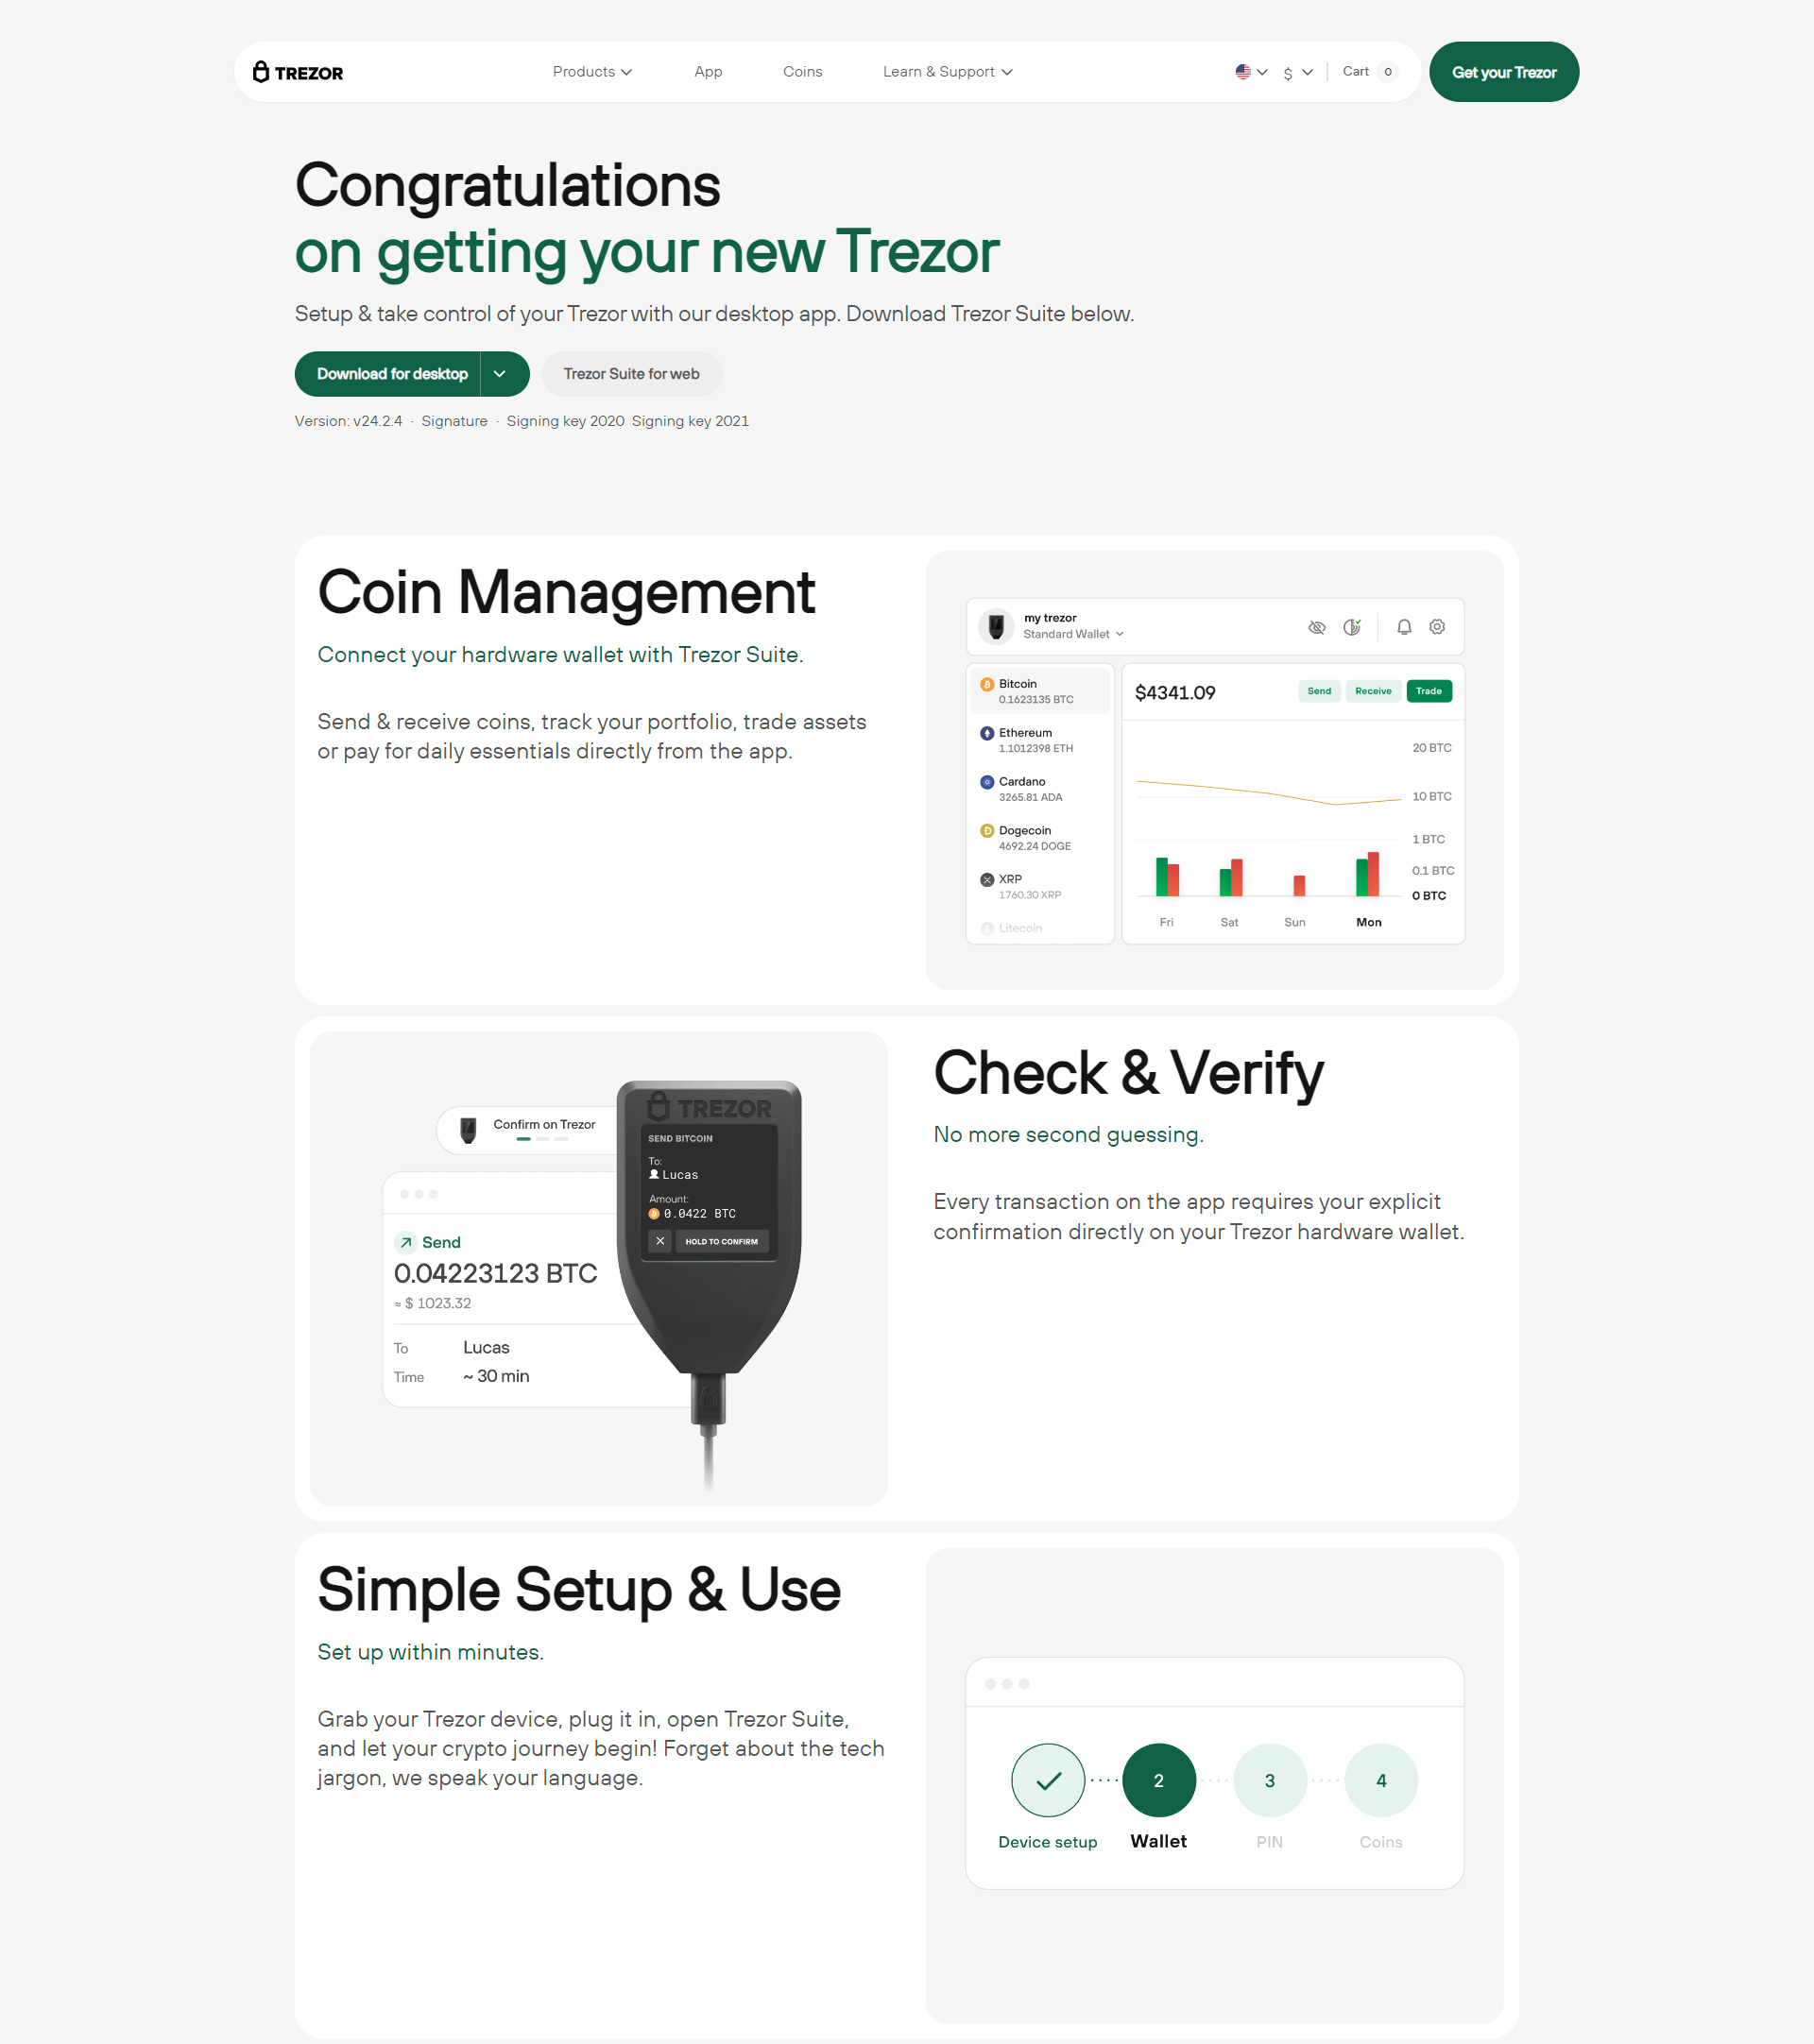
Trézor.io/Start® is the official onboarding platform for Trezor hardware wallets. It’s where you’ll:
- Install the Trezor Suite app
- Update or install firmware
- Create and back up your wallet
- Learn important safety tips to protect your crypto
It’s the only recommended starting point for initializing your Trezor device securely — and it's designed for both beginners and experienced users.
Why Start Here?
There’s no shortage of setup guides online, but many of them are outdated, unofficial, or even malicious. Crypto phishing sites often impersonate real tools and trick users into revealing their private keys or recovery phrases.
That’s why it’s crucial to start at Trézor.io/Start®, where every step is secure, up-to-date, and verified by Trezor's official team. This ensures:
- You’re using the latest, most secure firmware
- Your recovery seed is generated safely
- You're never exposed to fake software or scam apps
How to Set Up Your Trezor Wallet (Step-by-Step)
Let’s go through the full setup process. It’s quick, easy, and you only need your Trezor device, the included USB cable, and a computer.
Step 1: Visit Trézor.io/Start®
Open your browser and head over to Trézor.io/Start®. Double-check the URL to make sure it’s correct and not a spoofed version.
Select your device model: Trezor Model One or Trezor Model T.
Step 2: Download Trezor Suite
Trezor Suite is the official app used to manage your wallet. Download and install the version for your operating system (Windows, macOS, or Linux).
It allows you to:
- View balances
- Send/receive crypto
- Manage coins and accounts
- Swap or exchange crypto directly from your dashboard
Step 3: Connect Your Device
Use the USB cable to connect your Trezor to your computer. Open Trezor Suite and it will detect your device automatically.
If your device doesn’t have firmware yet, you’ll be prompted to install it — a necessary first step before you can create a wallet.
Step 4: Create a New Wallet
After the firmware is installed, choose the option to create a new wallet. Your Trezor will then generate a 12- or 24-word recovery seed — this is your backup in case your device is lost, stolen, or damaged.
📌 Important:- Write your recovery seed down on paper.
- Store it offline in a secure place.
- Never take a photo or save it on your phone or cloud.
Step 5: Confirm Your Seed and Set a PIN
Trezor will ask you to confirm a few of the words in your recovery phrase to make sure you’ve written them correctly. Once confirmed, you’ll set a PIN — a code you’ll need each time you unlock your wallet.
And that’s it — you’re ready to go!